
티스토리 뷰
Asciidoctor는 문서 모델로 구문을 분석하고, HTML과 같은 출력 형식으로 빠르게 변환하기 위한 텍스트 프로세서이다.
Spring Rest Docs는 Spring으로 개발한 Rest API를 자동으로 문서화해주는 도구이다.
테스트 코드로부터 생성 시작되며, 테스트가 성공해야 만들어지기 때문에 아래의 장점이 있다.
- 운영 코드에 영향을 주지 않는다.
- 테스트 코드로 인해 안정적이고, 유지보수에 용이하다.
build.gradle
[플러그인 추가]
plugins {
    // ...

    id 'org.asciidoctor.jvm.convert' version '3.3.2'
}- Asciidoctor 플러그인을 적용한다.
- Gradle 7 버전 이상일 때
org.asciidoctor.jvm.convert 3.3.2버전을 사용한다. - Gradle 7 버전 미만일 때
org.asciidoctor.convert 2.4.0버전을 사용한다.
[구성 추가]
configurations {
    // ...

    asciidoctorExt
}- Asciidoctor를 확장하는 종속성에 대한 구성을 선언한다.
[의존성 추가]
dependencies {
    // ...

    testImplementation 'org.springframework.restdocs:spring-restdocs-mockmvc'
}- 테스트 코드에서 MockMvc를 통해 문서를 생성하는 데 필요하다.
MockMvc는 테스트를 위한 가짜 객체로 스프링 MVC 동작을 재현할 수 있다.
[변수 선언]
ext {
    snippetsDir = file("$buildDir/generated-snippets")
}- 여러 라이브러리 모듈이 포함되어 있을 때 모듈 간 공유할 수 있는 변수를
ext에 선언한다. - 문서를 만들기 위한 조각들이 담기는 장소를 지정한 것이다.
[작업 설정]
test {
    useJUnitPlatform()
    outputs.dir snippetsDir
}

asciidoctor {
    inputs.dir snippetsDir
    configurations 'asciidoctorExt'
    dependsOn test
}- test 작업 시 output을 위에서 설정한 snippetsDir에 담도록 한다.
- asciidoctor 작업은 test 작업을 의존하기에, test 작업을 먼저 수행하도록 한다.
- asciidoctor 작업에 필요한 input이 snippetsDir에 있는 것을 알 수 있다.
- 구성 추가에서 확장한
asciidoctorExt를 사용한다.
[선행 작업 지정]
asciidoctor.doFirst {
    delete file("src/main/resources/static/docs")
}- asciidoctor 작업을 실행하기 전, 해당 경로의 파일을 모두 지울 수 있도록 한다.
- 이전에 진행한 내용을 삭제함으로 중복되는 내용을 방지한다.
[Jar 빌드 작업]
bootJar {
    dependsOn asciidoctor
    from("${asciidoctor.outputDir}/html5") {
        into 'static/docs'
    }
}- 프로젝트를 Jar 파일로 생성할 때, Rest Docs가 해당 경로에 들어갈 수 있도록 한다.
[빌드 작업]
task copyDocument(type: Copy) {
    dependsOn asciidoctor
    from file("$buildDir/docs/asciidoc")
    into file("src/main/resources/static/docs")
}

build {
    dependsOn copyDocument
}- 빌드 시
copyDocument작업을 수행한다. - copyDocument작업은 프로젝트를 실행했을 때 문서에 접근할 수 있게 하려고 복사하는 과정을 수행한다.
[build.gradle]
/******* Start Spring Rest Docs *******/
ext {
    snippetsDir = file("$buildDir/generated-snippets")
}

test {
    useJUnitPlatform()
    outputs.dir snippetsDir
}

asciidoctor.doFirst {
    delete file("src/main/resources/static/docs")
}

asciidoctor {
    inputs.dir snippetsDir
    configurations 'asciidoctorExt'
    dependsOn test
}

bootJar {
    dependsOn asciidoctor
    from("${asciidoctor.outputDir}/html5") {
        into 'static/docs'
    }
}

task copyDocument(type: Copy) {
    dependsOn asciidoctor
    from file("$buildDir/docs/asciidoc")
    into file("src/main/resources/static/docs")
}

build {
    dependsOn copyDocument
}
/******* End Spring Rest Docs *******/test->asciidoctor->copyDocument->build순으로 작업이 진행되어 애플리케이션을 실행시키면http://localhost:8080/docs/html파일명경로를 통해 API 문서에 접근할 수 있다.
MockMvc 설정
@ExtendWith({RestDocumentationExtension.class})
@Transactional
@SpringBootTest
public class IntegrationTest {

    @Autowired
    protected WebApplicationContext webApplicationContext;

    protected MockMvc mockMvc;

    @BeforeEach
    protected void setUpAll(RestDocumentationContextProvider restDocumentationContextProvider) {
        this.mockMvc = MockMvcBuilders.webAppContextSetup(webApplicationContext)
            .addFilter(new CharacterEncodingFilter("UTF-8", true))
            .apply(documentationConfiguration(restDocumentationContextProvider)
                .operationPreprocessors()
                .withRequestDefaults( // (1)
                    modifyUris().scheme("https").host("docs.api.com").removePort(), prettyPrint())
                .withResponseDefaults(prettyPrint()) // (2)
            )
            .build();
    }
}MockMvcBuilders를 통해 MockMvc를 생성할 수 있다. 설정으로 WebApplicationContext를 사용하는데, 스프링에서 로드한 WebApplicationContext의 인스턴스로 동작하기에 컨트롤러는 물론 의존성까지 로드되어 완전한 통합테스트가 가능하다.
필터에 UTF-8을 강제하는 CharacterEncodingFilter을 추가하여 MockMvc 사용 시 한글 깨짐을 방지한다.
RestDocument는 요청과 응답을 수정할 수 있는 전처리기를 제공한다.
(1) : 문서의 Request URI를 기본 http://localhost:8080에서 https://docs.api.com으로 변경하고, 예쁘게 출력할 수 있도록 한다.
(2): 문서의 Response를 예쁘게 출력할 수 있도록 한다.
통합 테스트를 수행하는 테스트는 위의 클래스를 상속받아서 사용하면 된다.
Snippet 커스텀
// request-fields.snippet
|===
|필드명|타입|필수값|설명

{{#fields}}

|{{#tableCellContent}}`+{{path}}+`{{/tableCellContent}}
|{{#tableCellContent}}`+{{type}}+`{{/tableCellContent}}
|{{#tableCellContent}}{{^optional}}true{{/optional}}{{/tableCellContent}}
|{{#tableCellContent}}{{description}}{{/tableCellContent}}

{{/fields}}
|===
기본적으로 템플릿을 제공하지만, 필요하다면 출력되는 템플릿을 커스텀할 수 있다. src/test/resources/org/springframework/restdocs/templates/ 경로에 request-fields, request-parameters, request-parts 등 파일을 생성하면 해당 파일로 적용된다.
mustache 문법을 사용하는데 간단히 정리하면 아래와 같다.
- 변수 : {{변수이름}}
- 섹션 : {{#key}}{{value}}{{/key}}
- 반전 : {{^변수이름}}value{{/변수이름}}
- 사용된 적이 없거나, false, 0, 빈 문자열, 빈 배열일 때 value가 출력된다.
결과 확인
mockMvc.perform(patch("/comments/{id}", "1")
        .queryParam("message", "update Message")
        .cookie(new Cookie(ACCESS_TOKEN.getName(), "token")))
    .andDo(print())
    .andExpect(status().isSeeOther())
    .andExpect(header().string("Location", "/comments/posts/" + postId))
    .andDo(document("comment-update",
        requestCookies(
            cookieWithName(ACCESS_TOKEN.getName()).description("사용자 인증에 필요한 access token")
        ),
        pathParameters(
            parameterWithName("id").description("수정하고자 하는 댓글 ID")
        ),
        queryParameters(
            parameterWithName("message").description("업데이트하고자 하는 댓글 내용")
        ),
        responseHeaders(
            headerWithName("Location").description("해당 게시글 댓글 목록을 불러오기 위한 Redirect URI")
        )));
위의 코드와 같이 MockMvcRestDocumentation.document를 통해 스니펫 조각들을 생성할 수 있다. 생성된 스니펫 조각들은 build.gradle에서 설정한 build/generated-snippets 경로에 존재한다.
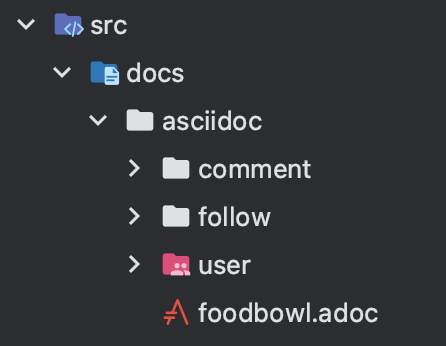
생성된 스니펫 조각으로 src/docs/asciidoc 경로에 adoc파일을 작성하면 빌드 시 src/main/resources/static/docs 경로에 동일한 파일 경로로 html 파일이 생성되기에 애플리케이션 실행 시 해당 경로로 접근하면 API 문서를 확인할 수 있다. 결과물은 아래와 같다.

참고
'Spring > Spring Boot' 카테고리의 다른 글
| [Spring Boot] 프로메테우스, 그라파나를 이용한 스프링 부트 모니터링 (3) | 2023.07.02 |
|---|---|
| [Spring] 영속성 컨텍스트는 어디까지 유지되는가 (4) | 2023.03.12 |
| 동아리 홈페이지 투표 개발 3 - 개발 및 적용 (0) | 2022.10.14 |
| 동아리 홈페이지 투표 개발 2 - WebSocket과 STOMP (0) | 2022.10.05 |
| 동아리 홈페이지 투표 개발 1 - 개요 및 설계 (0) | 2022.09.28 |